Gutenberg is a text editor that stands as a brand new editor for WordPress content. These take your brand-new block-based content creation expertise to an entirely new level. It means you do not need a regular single box. Also, it breaks up the various kinds of contents in different blocks. Plus, this will give the flexibility to build extra complex content plus layouts like a paragraph, button, picture, and as well as much more will be possible. In this blog, I discuss the Gutenberg Beginner to Master.
Although, whenever you add the new functionality. You can also re-position the blocks as per your choice! You can move them up or down and place them exactly where you prefer without the necessity of a page builder. If you proceed to make any changes to the content inside the blocks. Click on it and start making those changes.
Here, I am discussing some general tips and features from the Gutenberg beginner to master.
1. How to use Gutenberg?
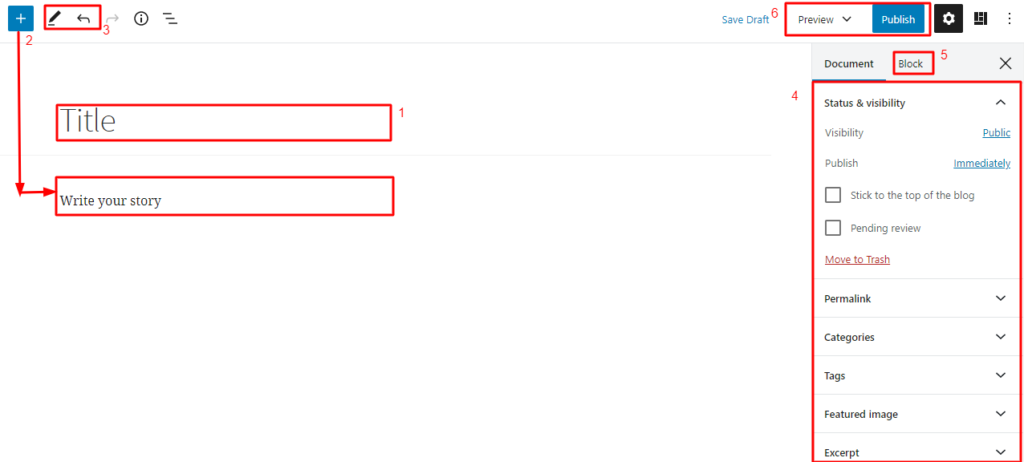
Step-1 Add a title to your page.
Step-2 Click on the plus button to add new Gutenberg blocks. Here, you can see all the available blocks. Now, you can select the blog as per the need.
Step-3 Undo and Redo buttons allow you to move forward as well as backward. It helps to edit the contents easily.
Step-4 The setting area performs a similar action. You can work in the TinyMCE editor. Here, you can add the categories, featured image, tags, select the visibility type, and as well as much more.
Step-5 In the block section, you can also select an individual block that displays relevant setting options.
Step-6 These buttons show your post preview, update, and publish.
2. Use of New Content Blocks
When you click on the plus button, a window will open. Here, you can show all the blocks like similar blocks, post layouts, layout elements, Embeds, and much more. Also, a search box is available. Here, you can search a block as per your needs.
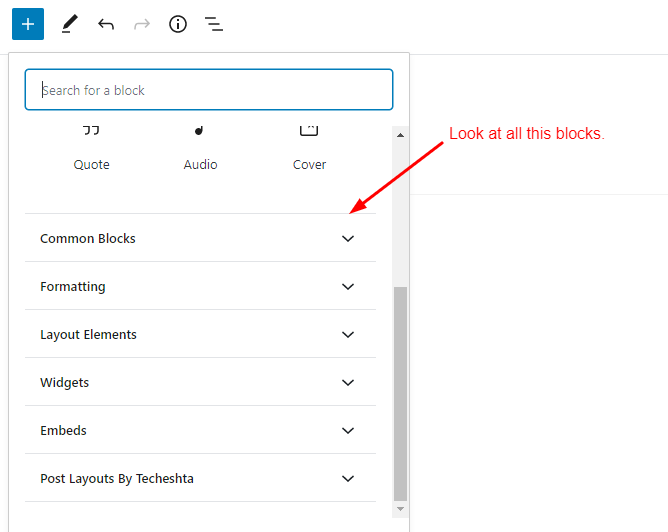
Embeds
Use of this tab, you can choose the blocks for embedding various video, audio, and other content from different social media platforms and popular websites.
Common Blocks
Here, you can browse all the blocks that are required.
Widgets
In this tab, you can choose the various widgets for your post. Like a calendar, RSS, search box, social icon, tag cloud, latest comments, categories, and as well as many more.
3. Keyboard Shortcuts for Gutenberg Editor
The most generic keyboard shortcuts work in Gutenberg. Like Bold Word Ctrl + B. Gutenberg have its list of keyboard shortcuts. Use more keyboard shortcuts, click on the three-dot menu on the top-right corner of your screen, and then select ‘Keyboard Shortcuts’.
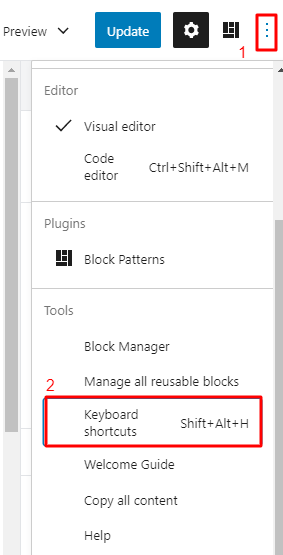
Now, you can show a full list of keyboard shortcuts.
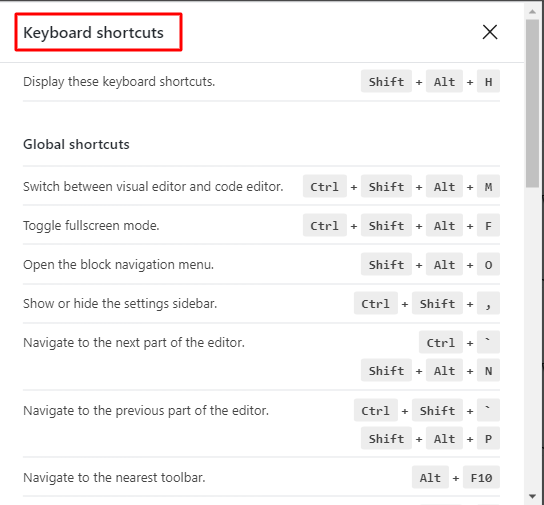
Here are some listed shortcuts.
- Ctrl + Alt + T – Insert a new block before the selected block.
- Ctrl + Alt + Y – Insert a new block after the selected block.
- Ctrl + Alt + Backspace – Delete the select block.
- ## To create a heading
- 1. To create an ordered list
- * To create an unordered list
- > To create a quote
4. Drag-And-Drop to Rearrange Your Blocks
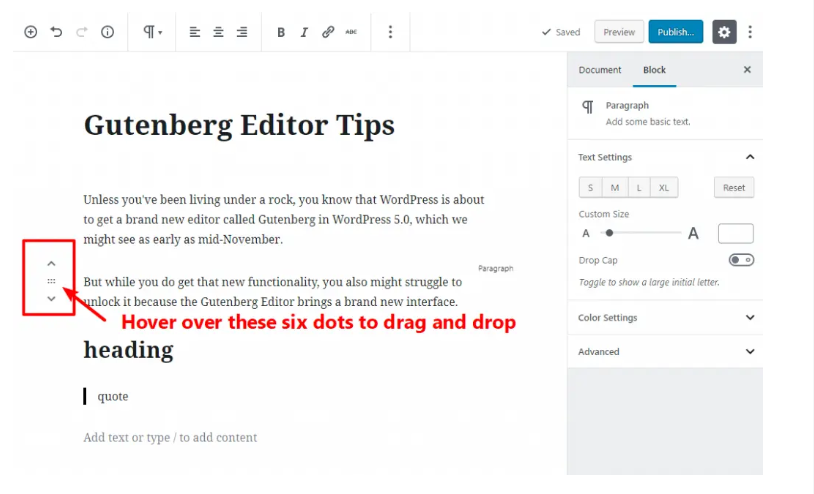
In the old editor, whenever you want to rearrange the content, you can only option the cut and paste. In Gutenberg, you want only hover over the six dots icon on the left and easily rearrange the block.
5. The Code Editor For Direct HTML Edits
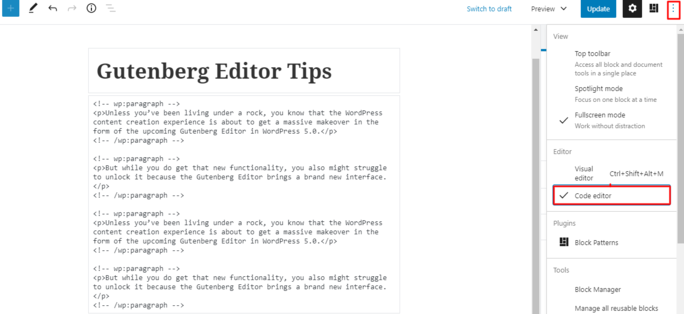
Like TinyMCE editor, Gutenberg also gives the direct HTML edits. To access the HTML editor, you can use Ctrl + Shift + Alt + M keyboard shortcut. Otherwise, use the three dots icon in the top right corner.
Conclusion
As a comparison of the default editor, the Gutenberg editor consists of a lot more impressive content customization. It is one of the goals the publishing experience is better. I hope this blog is helped you to get intimate with the Gutenberg blocks editor.
